
These meetings start at 9 am local time and end about 3 pm
Inspectors from the Ag Branch of the Kentucky Division of Pesticide Regulation will check the pesticide records and Worker Protection Standards compliance of approximately 200 randomly-selected private applicators this winter. Farmers will receive an advance written notice. During the visit, the inspector will provide the farmer with information on record keeping requirements, review pesticide application records, and provide compliance assistance, if needed. This is a national program to see how well private applicators are complying with the law. Individual farmers names or certification numbers will not appear on the inspection sheets. Identity and results of individual inspections will remain confidential.
Keeping pesticide records is good business practice and has numerous benefits! Here are a few examples: Saves money - Accurate pesticide records will enable you to know and buy the correct amount of pesticides for each growing season. Shows what is working - Good records will help you determine how a pesticide application achieved the best results or why a pesticide may have performed poorly and prevent future repeated failures. Documents correct use - Should a question arise concerning pesticide use, your records may provide liability protection. Improves management decisions - Since some pesticides have restrictions on what can be planted the following year in the same field, good records can help you plan your crop rotations.
Go here for a printable suggested record-keeping form
 Hopefully, after last season more of the tobacco industry
appreciates that having healthy, disease-free transplants
is an important first step to controlling diseases in the
field and having a profitable tobacco crop. Most tobacco
transplant production in our region uses containerized-
transplants, by way of the float system in either
greenhouse or outdoor locations. In this system, cells of
styrofoam trays are filled with a soilless medium, seeded
with a pelletized seed, and floated in a shallow bay of
water from germination until ready for the field. The cells
in the styrofoam trays are perforated in the bottom to
allow water and nutrient uptake, but a portion of the tray
(0.25 to 2.0 inches) is submerged plus "water-roots" grow
into the liquid medium. This keeps much of the root
system under constant saturation on most farms, and in
poorly managed situations portions of the lower stem are
constantly wet, too. Moreover, the trays of plants are
taken to the field and typically reused, providing an ideal
mechanism for cycling and new introduction of
pathogens into the system.
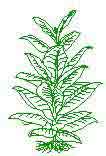
Hopefully, after last season more of the tobacco industry
appreciates that having healthy, disease-free transplants
is an important first step to controlling diseases in the
field and having a profitable tobacco crop. Most tobacco
transplant production in our region uses containerized-
transplants, by way of the float system in either
greenhouse or outdoor locations. In this system, cells of
styrofoam trays are filled with a soilless medium, seeded
with a pelletized seed, and floated in a shallow bay of
water from germination until ready for the field. The cells
in the styrofoam trays are perforated in the bottom to
allow water and nutrient uptake, but a portion of the tray
(0.25 to 2.0 inches) is submerged plus "water-roots" grow
into the liquid medium. This keeps much of the root
system under constant saturation on most farms, and in
poorly managed situations portions of the lower stem are
constantly wet, too. Moreover, the trays of plants are
taken to the field and typically reused, providing an ideal
mechanism for cycling and new introduction of
pathogens into the system.
High plant density and high moisture conditions are often also present in these systems providing extended periods of stem and leaf wetness. Where fertilization is not managed well, succulent plant tissue and/or nutrient starved conditions favor development and spread of seedling diseases. In addition, certain diseases that may not be a problem in outdoor soilbeds become a problem in greenhouses. The most common diseases found in tobacco float systems are Pythium diseases (damping off, root rot and stem rot), Rhizoctonia diseases (damping off, stem rot, and target spot), Bacterial Blackleg/bacterial soft rot, Sclerotinia collar rot, Fusarium diseases (root rot, stem rot, and wilt), Black Root Rot, Botrytis gray mold, blue mold, and black shank.
Infectious diseases in transplant production have become increasingly important and last year they caused major losses in both the transplant sites and later in the field. I urge all to appreciate that the current transplant production methods being used are highly conducive to disease development once the pathogens have been introduced. Therefore, the key to controlling these diseases is to keep the pathogens out of the system. A diligent sanitation program is how you keep them out!
The pathogens causing such diseases are entering the system through contaminated trays, in contaminated soil, contaminated water, through vents, on workers'/visitors' hands and shoes, on tools, on animals, etc. Therefore, the keys to managing diseases in the float system are to keep the pathogen out of the system and manage environmental conditions to keep humidity low and float water temperature cool. However, that is easier said than done, especially where trays are reused. Note that several of the above diseases are field pathogens, so all precautions should be taken to ensure that field soil or used media does not enter the system.
Everything used in the system needs to be free of pathogens, and if not free, at the lowest population levels feasible. The media and water being used should be pathogen-free. All equipment and tools that come in contact with the system should be pathogen-free. That means either new trays must be used or re-used trays must be properly washed and sanitized.
Tray Sanitation:
What is available to disinfect trays? Steam, methyl- bromide fumigation, chlorine-bleach, and quaternary ammonium chloride salts are available in Kentucky. None of these materials have been totally effective in killing all the pathogens and exactly how to best use them at the farm-level is not fully understood. Each has positive and negative points, which have been addressed in several previous Ky Pest News articles.
STEAMING TRAYS: In our studies, aerated-steam (and other forms of wet heat) have been the most effective disinfectants - does the best job of killing the range of pathogens we are facing in Kentucky. But its cost is high and some items are damaged by steaming. Moreover, most growers do not have it available. Our studies with heavily contaminated trays have demonstrated that the trays need to reach at least 160F to 175F for 30 minutes (timing starts once the desired temperature is reached, not total time), but lower temperatures at much longer times have been effective in other research. Some commercial transplant producers are successfully using steam, the temperature/times being used mainly depends upon the assessment of risk potential.
FUMIGANTS: Methyl bromide with 1% chloropicrin has been almost as effective as steam in some of the tests. It provides excellent control of Rhizoctonia and other fungi on the surface of the tray. It will also greatly reduce the level of Pythium, but has not been as effective as steam or proper bleaching in reducing Pythium, probably because a significant amount of Pythium is found embedded in the tray. We find great variation in the amount of control provided within the lot of trays, also. It is important to us an air-tight plastic seal, to pre-wet the trays, and to avoid large stacks of trays. Methyl-bromide is heavier than air, so it sinks, therefore best results occur with long, short stacks rather than tall, deep stacks. We have found little control is provide at the low rates, so use the maximum labeled rates (3 lbs/1000 cubic feet or about 500 trays, stacked criss-crossed). Temperatures need to be above 50F and the fumigation event needs to last at least 24 hours, with a least 48 hours of aeration before using. Do not fumigate inside a greenhouse. Certain types of styrofoam trays appear to be more easily damaged with this chemical. Pay special attention to ALL label precautions related to safety.
CHLORINE BLEACH: Just dipping trays in bleach will not provide satisfactory results with contaminated trays. However, properly used this material can provide a significant level of sanitation for the small grower unable to manage either steam or fumigation. Chlorine bleach solutions have given a high level of control in our tests with highly contaminated trays but, over-all, are not as effective as either steam or properly conducted fumigation. We have found little benefit to using more than 10% solution, plus there is increased phytotoxicity potential. Without proper aeration and post-washes, salt residues can cause serious problems, especially with older trays that tend to soak up more materials. Bleaches work best when the trays are washed with soapy water, then dipped several times into clean 10% solution, followed by covering them with tarp to keep them wet over-night with the bleaching solution. Afterwards, the bleach solutions should be washed from the trays with clean water or water plus a Q-salt listed below, followed by aeration - to eliminate the chlorine and salts of chlorine. Worker safety issues are also important with bleach. It is important that the bleach solution remain below pH 6.8 and that new solution be made up every 2 hrs or whenever it becomes dirty, which ever comes first. Organic matter will remove the active ingredients quickly.
Q-SALTS (Quaternary ammonium chloride salts): These are marketed under such names as Greenshield, Physan, and Prevent as solution containing 20% ammonium chloride. Many growers are using them, but the effects are not as positive as some believe, based on our testing. I believe there greatest benefit is in the final wash and on exposed surfaces in the greenhouse. In all our test, they have always provided some control, as compared to using soap washes only, but have always been inferior to any of the above mentioned methods.
Additional Sanitation Steps:
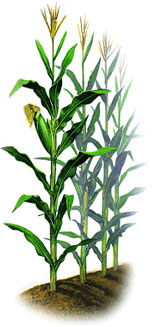
 This past autumn, occasional questions were raised about
testing for mycotoxins in corn. The possibility of
contamination with aflatoxins and fumonisins was of
concern.
This past autumn, occasional questions were raised about
testing for mycotoxins in corn. The possibility of
contamination with aflatoxins and fumonisins was of
concern.
Sampling The "weakest link" in quantifying mycotoxin levels is in sampling. There can be quite of bit of natural variation in mycotoxin test results from sample to sample pulled from a grain lot, even when good sampling procedure is used. The variation can be even worse when sampling is not sound. For stationary shelled corn, sample using a grain probe (sometimes referred to as a trier). Don't collect a sample just from the most convenient place, like the top of the truck or storage bin. The odds are good that this will give a misleading result, since mycotoxins are distributed very unevenly in a lot of corn. Take a minimum of 4-5 probefuls (preferably 10 probefuls) and collect 10 lb of corn. For a moving stream of grain, use a diverter-type mechanical sampler; if one is not available, cautiously grabbing fistfuls can also be suitable; take care to avoid personal injury.
If the test is not to be performed within 12-24 hours, dry the corn to below 16% moisture. If high-moisture corn is held for an extended period of time before testing, the test results may not be accurate, as mycotoxin-producing fungi can continue to grow and produce mycotoxins in the sample.
Grind the aggregate sample and mix it very well. A one or two pound subsample should be drawn from that; a riffle divider is the best way to obtain a representative subsample. Blend this subsample by lifting or rolling the ends of the bag to the opposite side and repeating at least ten times. A final subsample can be withdrawn from this for testing. Be sure to thoroughly clean grinding and sampling equipment between samples. Remember you are working with potentially toxic materials. For personal protection, wear a dust mask when grinding, mixing, and dispensing the sample. Minimize dust and exposure to it at all times.
Test Kits
Test kits have commercially available for several years for
testing grain for certain mycotoxins, including aflatoxins
and fumonisins. A list of commercial mycotoxin kits of
which I am aware can be found at
The chemical basis of most of these test kits is technically
called a "competitive, heterogenous ELISA". The details
of what this means is beyond the scope of this newsletter,
but a consequence of this is that such techniques have
more potential for a "false positive" (a positive test result
where no mycotoxin is actually present) than more
sophisticated laboratory procedures. Thus, a positive test
result with an ELISA-based test kit is not an absolute
guarantee that the mycotoxin is actually there in a given
sample. However, I suspect this problem is uncommon
because research studies which I have seen show
relatively good agreement between the ELISA kits and
more sophisticated lab procedures. Thus, I see no reason
not to use these kits for routine screening purposes of
grain. Several of these kits are approved for mycotoxin
detection by the USDA Grain Inspection, Stockyard, and
Packers Administration.
Laboratories where grain samples may be tested for
mycotoxins are listed at
The most common and dramatic problems of greenhouse
ornamentals in Kentucky have been due to INSV. This
virus is usually the one causing problems on impatiens,
New Guinea impatiens, begonias, petunias snapdragons,
cyclamen, cineraria and gloxinia. Both viruses are
transmitted from plant to plant by western flower thrips.
An adult thrips can infect a plant with virus after feeding
for only 30 minutes. TSWV is very damaging to tobacco,
tomatoes, and peppers, but it also attacks some
ornamentals, most often dahlias imported from overseas,
and chrysanthemums and (rarely) ivy geraniums. Both
viruses have a very wide host range and both are
vectored by thrips, especially western flower thrips .
Virus Disease Symptoms. TSWV/INSV causes a wide
variety of symptoms including wilting, stem death,
stunting, yellowing, poor flowering; and sunken spots,
etches, or ring spots on leaves. Symptoms are not very
specific or consistent, and merely tell the grower that
there is something wrong with the plant. Many other
diseases and plant problems can cause symptoms that
resemble TSWV/INSV. Virus symptoms may depend on
time of year, type of plant, age of plant, plant
physiological state, growing conditions at the time of
infection, and strain of virus. Positive diagnosis is made
by submitting a plant to a plant disease clinic that uses
either inoculation of special indicator plants or chemical
tests to determine if the virus is present. In the U.K. Plant
Disease Diagnostic Laboratory, separate tests are used to
look for both TSWV and INSV. A plant may have either
or both viruses.
Managing INSV and TSWV on greenhouse ornamentals.
Insects can, by their own living processes, produce some
heat. If enough insects are gathered together in a small
group and some moisture is present, you could have a big
problem when spring comes. In addition, with the
number of rain / snow fall events we have had recently, it
is entirely possible that the grain surface could be wet.
Although nothing is happening while it is below freezing,
those wet spots are a prime location for problems with
insects, fungi, and sprouting as the temperatures warm.
If nothing else, take a buddy and take a look and a sniff at
the roof hatch of your bins. Often just the early discovery
of a musty smell, a warm spot or a wet spot will pay off
greatly.
Be very careful, do not go alone. It is cold and slippery
up there!!
Diagnosing the Problem- Head lice are bloodsucking insects
that live exclusively on humans. They usually infest only
the head, preferring the nape of the neck and the area
behind the ears.
The first indication of head lice is itching and scratching
caused by the bloodsucking habits of the louse.
Examination of the hair and scalp will usually reveal the
white or grayish crawling forms (about the size of a
sesame seed) and yellowish white eggs (nits) attached to
the hair shafts close to the scalp. The nits are sometimes
mistaken for dandruff or residues of shampoo but will
not wash off or be flicked off with a finger. Usually all life
stages can be seen with the naked eye, although a
flashlight and hand lens are helpful. Red bite marks or
scratch marks are often seen on the scalp or neck.
People should be aware that there are many factors (other
than lice) that may cause itching and irritation during the
winter. Dry air alone can cause irritation, producing a
condition known as "winter itch". As skin loses moisture,
itching results. A skin moisturizer or home humidifier is
often helpful in these situations. See ENT-50 Invisible
Itches: Insect and Non-Insect Causes.
Elimination and Prevention- There are four key steps to
eliminating head lice and preventing their return. Steps
1-3 should be performed at the same time in order to
avoid reinfestation.
1. The child or infected person(s) should be treated with a
pediculicide shampoo formulated specifically to control
lice. Several different products, most containing
permethrin or pyrethrins, are available through
pharmacists and physicians. Follow the directions on the
package. If one family member is infested, all others
should be examined. More than half of lice-infested
children have another infested family member at home.
2. Remove all nits using a fine-tooth louse comb.
Although this step can be quite time-consuming, nit
removal is critical to eradication. Louse control shampoos
often do not kill all the nits, and surviving eggs will hatch
within 7 to 10 days, continuing the cycle of reinfestation.
Dead nits also tend to remain attached to the hair, causing
uncertainty about reinfestation. Nits are most easily
removed by combing while the hair is slightly damp;
adding conditioner may make combing easier. Nits can
also be picked out with fingernails or cut out with small
safety scissors.
3. All personal articles that have been in contact with the
patients's head should be deloused. Normal laundering
with hot, soapy water (125 degrees F for 10 minutes), or
dry cleaning will kill lice and nits on pillowcases, sheets,
night clothes, towels, hats, and stuffed animals. Combs
and brushes should be soaked for 10 minutes in a pan of
very hot water.
Treatment of the premises or clothing with insecticides is
generally not required or recommended for the control and
prevention of head lice. This is because the lice cannot
survive for more than a day or so off of their human host;
nits lose viability within a week. As an added precaution,
carpeting and furniture contacted by infested individuals
may be vacuumed.
4. To reduce the chance of reinfestation, children should
be instructed not to share hats, clothing or brushes with
their classmates. Each child should have a separate
storage space for their hats and other clothing at home
and school to prevent contact with other garments. If this
is not possible, coats should be hung on hooks so they do
not touch, or on the backs of students' chairs.
Managing Persistent Infestations- Despite all of the above
efforts, there are times when a head lice infestation seems
to persist indefinitely. Persistent infestation may be due to
various causes, one of the most likely being improper use
of the pediculicide (e.g. insufficient time shampoo left on
the hair, or failure to reapply after 7 to 10 days). Other
times, not enough time was spent combing out the nits or
no effort was made to concurrently treat other infested
family members.
In rare, but increasing instances, the product in use may
have lost its effectiveness. Head lice resistance to
pediculicides has been documented recently in certain
areas of the world, especially to permethrin. Resistance to
pyrethrin/piperonyl butoxide formulations appears to be
less common. If resistance is suspected to the pediculicide
you have been using, consult with your
physician.
Elimination of a head lice outbreak in a school, nursing
home, or similar shared facility requires prompt,
coordinated action and administrative support to prevent
the spread of lice to uninfected individuals. Unless all
affected persons are treated, the condition will continue.
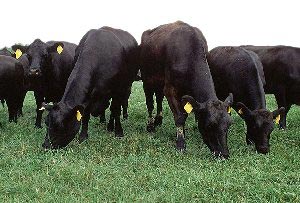
Hog lice and mange mites are two external parasites that
can become serious swine pests during the winter. Cold
temperatures favor the development of lice while
bunching of animals increases contact and allows
ectoparasites to spread quickly throughout the herd. Hog
lice use piercing, sucking mouthparts to feed on blood.
Heavy infestations can be especially serious for young
pigs. In combination with other winter stresses, lice can
harm large animals, too.
A hog louse lives about 5 weeks and spends its life cycle
on the animal. Single eggs or nits are glued to hair shafts
and hatch in 2 to 3 weeks. Lice feed on tender areas of
skin- inside ears or in folds of skin on the neck. The slate
blue lice can blend in with the skin and be overlooked,
even though adults are about 1/4" long. The good spots
get taken up, so lice may move and settle around upper
inside areas of legs and around the tail of a heavily
infested animal.
Lice feed frequently and produce a persistent and
annoying itching sensation. Severe infestations cause the
animal's skin to show measle-like bumps. "Lousy"
animals repeatedly rub against feeders, posts, and other
objects. This produces hair loss and cracked skin.
Lice can be seen with the naked eye but mange mites are
much smaller. Positive diagnosis requires microscopic
examination of skin scrapings. Mites burrow into skin-
literally digesting their way through it. The life cycle takes
about 2 weeks. As with lice, the feeding produces severe
itching and causes the animals to rub. Mange lesions can
start anywhere but usually occur first on the head,
typically around the ears, eyes or nose. They are not
exposed like lice so control with contact insecticides is
tougher.
Mange mites burrow within the skin of the animal. Strong
digestive enzymes dissolve the tissue producing a liquid
upon which the mites can feed. Infestations cause severe
itching and infested animals rub frequently to get some
relief. Scabs usually show up first on the head, especially
around the eyes, nose, and ears. Mites present in the ears
may be missed during examination or treatment and can
result in a resurgence of the problem.
Do not make a hasty diagnosis. Skin lesions do not
automatically mean lice or mites. Check animals carefully.
Infestations do not have to be "either - or" - both lice and
mites can occur on the same animal.
Options for lice and mange control include sprays, dusts,
pour-ons, injection, or feed-through (See ENT-23, Insect
Control on Swine). When using sprays, remember where
these pests are on the animal and treat thoroughly. Spray
pressure must be sufficient to be effective against mites
and the animal must be wetted thoroughly. Treat on a
warm, sunny day so animals will dry rapidly. Dusts are
generally less effective than sprays but can be used for
louse control if only a few animals need treatment or
conditions do not allow spraying. Pour-ons and
bedding/pen treatments are effective against lice and are
recommended in cold weather when spraying is
prevented. Lice and mites can only survive off of the
animal for 2 to 3 days. They will not infest humans, pets,
or other livestock. Follow up on treatments to check on
results. A few mites or lice can survive to continue the
infestation.
The lesser mealworm (litter beetle and darkling beetles -
some of the kinder alternative names) can build to
overwhelming numbers in broiler house litter. The insect
is relatively intolerant of temperatures below freezing and
a winter litter clean out can expose and kill large numbers
of them with minimal chance of invasions of nearby
buildings or home.
The dark brown to black, ½ inch long adults and the light
yellow to brown wireworm-like larvae tend to congregate
in the older, deeper litter. They accumulate under
anything lying on or just below the litter surface, such as
floor feeders or caked litter. They tend to avoid very wet
or very dry situations. Spot litter removal can be helpful if
the whole house cannot be cleaned. Spread the litter on
fields where it (and the beetle adults and larvae) is
exposed to freezing temperatures. Spread of beetle-
infested litter when temperatures are above about 50o F
can result in some spectacular movement of the adults to
lights and invasions of homes or buildings.
More information on litter beetles is available in Entfact
507, available on-line at
http://www.uky.edu/Agriculture/Entomology/entfacts/livestc/ef507.htm
NOTE: Trade names are used to simplify the information presented in
this newsletter. No endorsement by the Cooperative Extension Service
is intended, nor is criticism implied of similar products that are not
named.
Lee Townsend
GREENHOUSE
TOMATO SPOTTED WILT AND IMPATIENS NECROTIC SPOT VIRUSES AND THEIR VECTOR, WESTERN FLOWER THRIPS-THREATS
TO ORNAMENTAL PRODUCTION IN THE GREENHOUSE
By John Hartman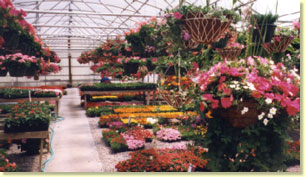 Diseases caused by tomato spotted wilt virus and
impatiens necrotic spot virus can cause losses in
Kentucky greenhouse ornamentals and to vegetable and
tobacco transplant operations. Although the virus and
thrips (the disease vector) are common, growers can
avoid crop losses by aggressively controlling thrips and
the viruses it spreads. Tomato Spotted Wilt Virus
(TSWV) and Impatiens Necrotic Spot Virus (INSV) are
two different but closely related viruses causing similar
symptoms.
Diseases caused by tomato spotted wilt virus and
impatiens necrotic spot virus can cause losses in
Kentucky greenhouse ornamentals and to vegetable and
tobacco transplant operations. Although the virus and
thrips (the disease vector) are common, growers can
avoid crop losses by aggressively controlling thrips and
the viruses it spreads. Tomato Spotted Wilt Virus
(TSWV) and Impatiens Necrotic Spot Virus (INSV) are
two different but closely related viruses causing similar
symptoms.
Perennial plant growers need to aggressively attack
TSWV and western flower thrips in both greenhouse and
outdoor plantings, and must be aware that plants
originating from greenhouse production but now planted
outdoors may carry the virus. Even if the thrips do not
overwinter in Kentucky, vegetatively propagating
infected plants will maintain and spread the virus.
Garden center operators must also be aware of the
biology of TSWV and western flower thrips, especially if
they keep herbaceous plants all year. Many perennials
are susceptible to the virus and attractive to thrips. An
infected perennial will retain the virus until that plant
dies.
STORED GRAIN
DON'T FORGET YOUR STORED GRAIN!!
By Doug Johnson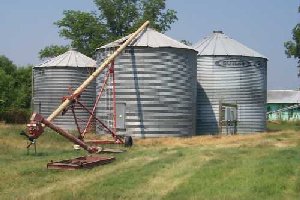 I know it's cold, and yes, that is a good thing for storing
grain ... for the most part. However, don't let the low
temperature lull you into a false sense of security and
ignore your bins. The low temperature stops insect
movement and reproduction and will probably kill a few.
But, bins do not always have uniform temperature and if
a large insect (or fungal) infestation was in place before
the temperature dropped, your grain could still be at risk.
I know it's cold, and yes, that is a good thing for storing
grain ... for the most part. However, don't let the low
temperature lull you into a false sense of security and
ignore your bins. The low temperature stops insect
movement and reproduction and will probably kill a few.
But, bins do not always have uniform temperature and if
a large insect (or fungal) infestation was in place before
the temperature dropped, your grain could still be at risk.
HUMAN/PUBLIC HEALTH PESTS
HEAD LICE
By Mike Potter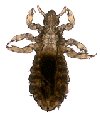 Head lice outbreaks are especially common this time of
year, especially on children. Schools bring large numbers
of children together in close, personal contact. Hats and
coats are often shared or hung together in the same closet,
permitting transfer of lice from one child to another.
Transfer of head lice can also occur by using infested
combs and brushes, or resting one's head on upholstered
furniture or pillows recently used by an infested
individual.
Head lice outbreaks are especially common this time of
year, especially on children. Schools bring large numbers
of children together in close, personal contact. Hats and
coats are often shared or hung together in the same closet,
permitting transfer of lice from one child to another.
Transfer of head lice can also occur by using infested
combs and brushes, or resting one's head on upholstered
furniture or pillows recently used by an infested
individual.
LIVESTOCK
HOG LICE AND MANGE MITES
By Lee Townsend
WINTER CLEAN OUT GOOD FOR LITTER BEETLE MANAGEMENT
By Lee Townsend
Extension Entomologist