
The Kentucky Geological Survey has archived this material, meaning (1) it is for reference, research, or recordkeeping; (2) it was created before April 24, 2026; (3) and the material has not been changed or altered since being archived. Please refer to our KGS Accessibility page for more information.
KGS Home >
Earth Science Education
Trilobite Masks
Age: K-4 (or any age, if you're looking for a unique Mardi Gras mask)
Summary: In this activity, students make trilobite masks out of paper plates. By drawing their own masks students can create a wide variety of different types of trilobites, and bring these ancient arthropods back to life. Connections can be made between trilobites and living arthropods, for a better understanding of the animal kingdom. Also, the examination of fossils of trilobites in order to make the masks, provides a context for discussion of fossils as evidence of past life.
Background: Trilobites were arthropods that lived in the seas of the Paleozoic Era. They are called trilobites because their bodies were divided into three parts. They were one of the first widespread, complex animals of the Paleozoic Era, starting out in the beginning of the Cambrian Period, more than 500 million years ago. They went extinct at the end of the Paleozoic Era, 250 million years ago. Trilobite fossils have been found on almost every continent. They are historically important because they were one of the first animals with complex eyes. Like many arthropods, the trilobite's soft body was covered with a hard shell, called an exoskeleton. Insects, which are arthropods, often have an exoskeleton. That's why beetles crunch if you step on them. During the 250 million years in which trilobites lived, their exoskeletons developed many different patterns, with bumps, spines, and other features for protection.
You'll need: Enough paper plates to make a mask for each student (use paper not wax covered). Styrofoam® plates may be used if crayons or markers can be used on the plates without smearing.
Crayons or markers for coloring and drawing on plates
Hole puncher to make eye holes
Scissors to cut plates and make eye holes
Pipe cleaners (optional: 2 for each mask, if you want to make antennae)
Elastic string or mask string with end hooks (1 for each mask)
Tape to hold elastic string, if mask string is not available
Optional: Additional pieces of construction paper, cardboard, circle- or star-shaped stickers, or other shapes for ornamentation
Safety: Make sure children are supervised by adults when using scissors.
Preparation time: 15-30 minutes
Directions1. Show the students pictures of trilobites. These can be obtained from picture books, or one of the Web sites noted above. Explain that tri-lo-bite means three-part-body, and show how a trilobite is divided into three parts. The fact sheet has a diagram, if you want to print out examples for each student. Next, show the students the head region of the trilobites (the cephalon). Many trilobites had big, complex eyes, somewhat like insect eyes. Insects are arthropods. Trilobites are fossil arthropods. Show pictures of some modern arthropods, or have students find pictures of arthropods from picture books. Many arthropods have segmented bodies. Trilobites had segmented bodies. They could roll up in a ball, like the "roly poly" pill bugs that exist today. The segmented body we see on pill bugs and other arthropods is really a hard armor shell. The arthropod's body is inside the shell. This type of shell is called an exoskeleton. Some of the students may have eaten shrimp or crab. Shrimp and crabs are arthropods. The soft part you eat has to be pulled out from under the shell, or armor casing. This outer shell is called an exoskeleton. Trilobites had exoskeletons. By making a mask, the student will be covering their face (soft parts) with an exoskeleton (the mask).
2. Look at pictures of trilobites or use one of the following to see different styles and shapes of trilobite cephalons (heads) that you can model your mask from, if you need some ideas.
Pick one of the three general head shapes from above that you want to use for your mask. Note that there are head shapes in which spines extend downward from the head, and others that lack these spines.
3. Cut the plate with scissors approximately in half to make a shape for the head. For the trilobite heads that lack spines, a straight cut works well (number 1 in the diagram). For heads that had spines attached to the end of the cephalon (called genal spines in the fossils), cut the plate to include the spines (number 2 in the diagram). Keep the part of the plate you aren't using for later use.
4. Cut out a nose notch half way across the cut you just made. This will make the mask fit better.
5. You may want to have a friend or your teacher position the mask on your face to see where the eye holes should go. Using a hole punch or scissors, cut out eye holes in the plate.
6. Using crayons or markers, draw eyes and decorations on the plate. You can use the trilobite head shape diagrams for suggestions. The mask will fit better if you draw on the back of the plate. If you draw on the front of the plate, the rim of the plate will stick out away from your face.
7. Most trilobites had eyes. They are famous for being one of the first animals to develop complex eyes. To draw typical arthropod "bug eyes" make a large circle, and then make a tic-tac-toe or criss-cross patttern within the circle as shown in the diagram. Some trilobites had eyes that looked like many smaller circles in a larger circle, and you can draw these if you prefer. Students don't have to draw the trilobite eyes where the eye holes are cut out of their mask. They should try to match the position from one of the examples, or use their own imagination.
8. Many trilobites had spines and bumps sticking out from their heads for protection (see Heads with spines, bumps, and other attachments). Some had antennae like crabs, shrimps, and lobsters that live in the sea today. Students can cut spines or antennae out of the half of the plate they cut away when they made their mask, or can use additional cardboard, pipe cleaners, or other materials as shown in the diagram.
9. When you're finished decorating your mask, punch two holes in the side of the mask, or make a small cut with the end of a pair of scissors, and guide a piece of elastic string through the holes. If you are using string made specifically for masks, it will have a small metal bar that secures the string once it has passed through the hole. If you are using a roll of elastic string, cut lengths appropriate for the student's head size. Guide the string through the hole, and tape the string to the plate by wrapping a piece of tape around the string, front and back.
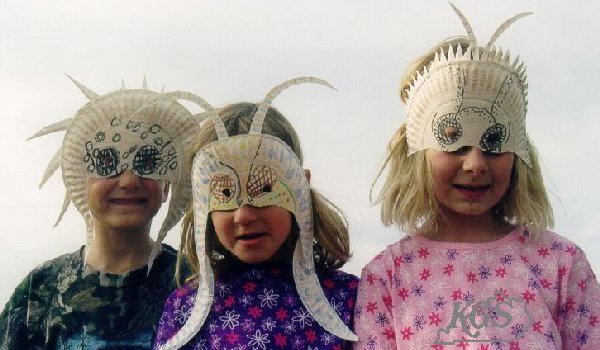
Three little trilobites
Trilobite masks made by kids at Lexington Children's Museum
For other trilobite activities see: