Macintosh Printing Instructions
In order to use the Popup print driver, you must either be connected to the "ukyedu-secure" wireless network or a hardwired connection.
To start using Popup for Mac OS X, add Popup printer queues on the computer:
Install MAC Black and White printing
- 1. Download and install the Popup.dmg.
- 2. Open System Preferences and click on the Print & Fax icon.
- 3. Click the + button.
-
4. Click on the Advanced button in the toolbar.
-
If the Advanced button is not enabled on your add printer toolbar you can add via the steps below
- Hold down the Control key on the keyboard and click anywhere on the toolbar.
- From the popup menu that appears, select Customize Toolbar
- Drag the Advanced icon to the toolbar and close the customization dialog
-
If the Advanced button is not enabled on your add printer toolbar you can add via the steps below
- 5. Click on the Advanced button in the toolbar.
- 6. From the Type popup button, select Pharos Print Server.
- 7. In the URL field, enter the URL for the desired Popup queue on a Pharos Print Server. This value should have the format “popup://pharosprint.ad.uky.edu/BW”.
- 8. In the Name field, enter "Student BW" for the new printer queue. This is the name that will appear on the computer.
- 9. From the Use dropdown menu, select “Generic PostScript Printer”.
- 10. Click Add.
- 11. To print to the new queue, select Student BW from the printer popup button in the print dialog of any application.
- 12. Open any Microsoft Word Document
- 13. Click File > Print
- 14. From the “Printer” dropdown select the correct printer
- 15. From the third dropdown select “Color Matching”
- 16. From the “Profile” dropdown select “Other Profiles…”
- 17. Select “Black & White”
- 18. From the “Presets” dropdown select “Save Current Settings as Preset…”
- 19. Name the Preset “Black & White”
- 20. Whenever you print, make sure you use the system dialog and select the “Black & White” preset.
Install MAC Color printing
- 1. Download and install the Popup.dmg.
- 2. Open System Preferences and click on the Print & Fax icon.
- 3. Click the + button.
-
4. Click on the Advanced button in the toolbar.
-
If the Advanced button is not enabled on your add printer toolbar you can add via the steps below:
- Hold down the Control key on the keyboard and click anywhere on the toolbar.
- From the popup menu that appears, select Customize Toolbar.
- Drag the Advanced icon to the toolbar and close the customization dialog.
-
If the Advanced button is not enabled on your add printer toolbar you can add via the steps below:
- 5. From the Type popup button, select Pharos Print Server.
- 6. In the URL field, enter the URL for the desired Popup queue on a Pharos Print Server. This value should have the format “popup://pharosprint.ad.uky.edu/Color”.
- 7. In the Name field, enter "Student Color" for the new printer queue. This is the name that will appear on the computer.
- 8. From the Use dropdown menu, select “Generic PostScript Printer”.
- 9. Click Add.
- 10. To print to the new queue, select "Student Color" from the printer popup button in the print dialog of any application.
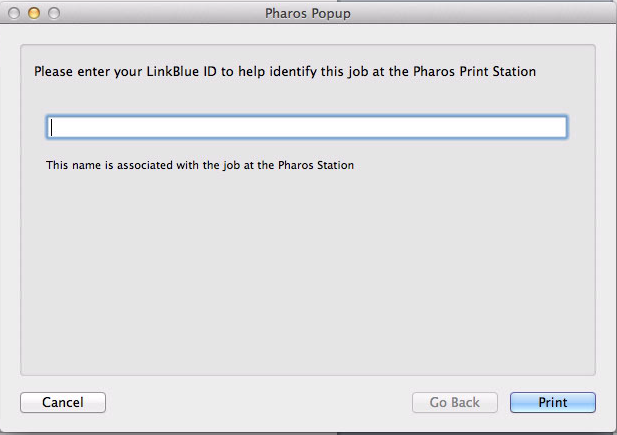
After selecting the printer you will see a popup window like below, follow the onscreen instructions to submit your print jobs: